Posted by Kim on August 19, 2020, 9:00am
Looking for something unusual and slightly nerdy to make tonight? Consider one of these prize-winning recipes from the winners of the Epic Week cooking contest.Claine's recreation of Pokemon's Spicy Sausage Curry
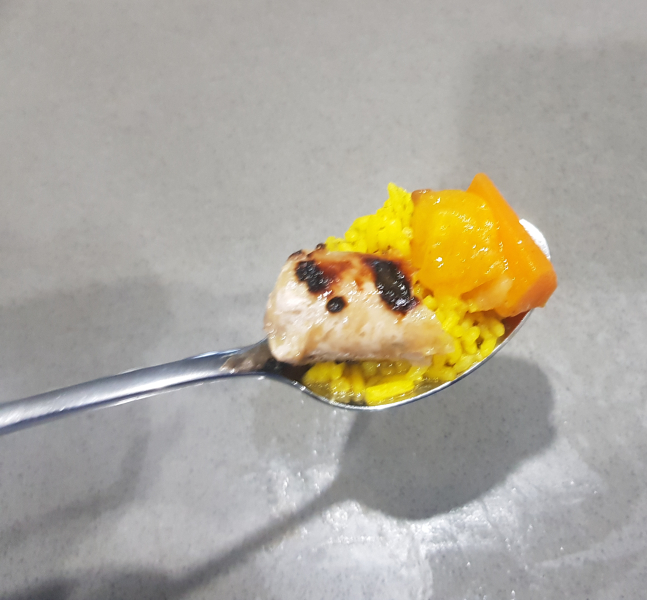
For this challenge, Claine chose to replicate a food from a video game. The the video game Pokemon Sword / Shield to be precise! This is the Pokemon Spicy Sausage Curry.

Click for Claine's instructions and more photos
First up the Ingredients:
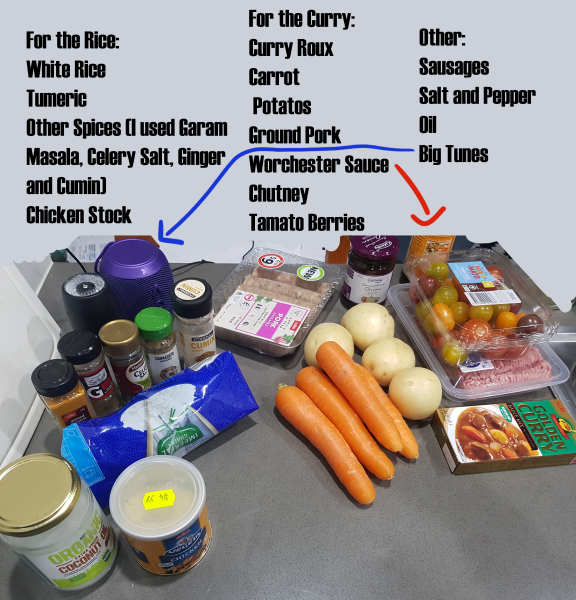
You may be thinking: "Claine, isn't it cheating to make curry with Curry Roux!" And to that I say no! In fact, this is the standard way of making curry in Japan! There's almost an entire aisle in the supermarket dedicated to various brands of curry roux! And considering it contains little more than oil, curry powder and a bit of thickening agent, it's no different than just buying curry powder.
By the way - for big tunes I recommend Gogol Bordello! But feel free to blast whatever flavour of tunes you enjoy!
1) Fry your pork. Chop your Carrots and Potatoes into large pieces and add to the pot when the pork is cooked. Add water, curry roux splash of Worcester sauce and tablespoon of Chutney. Any chutney will do! I used Onion today, but tomato or fruit chutney both also taste delicious! For me, half a box of roux resulted in the right thickness + spice but adjust if needed!
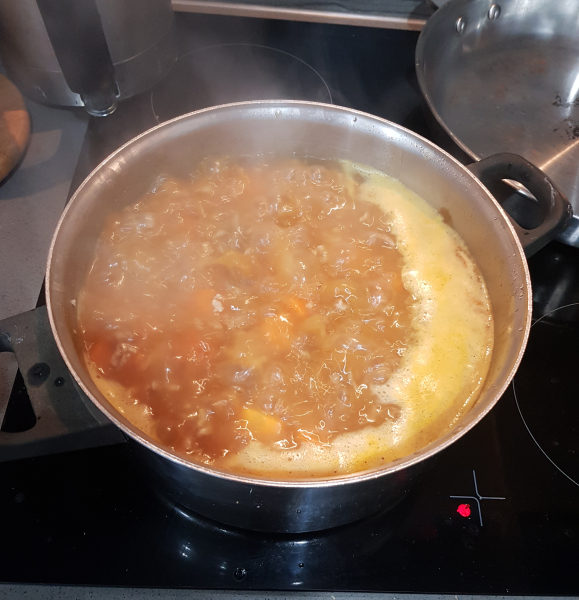
2) To a rice cooker add white rice, chicken stock (equal parts), turmeric, other spices, and a tablespoon of coconut oil. This recipe is easy to make, and feel free to put whatever spices you have hanging around! Chili, coriander, onion powder, garlic! Whatever you have on hand! Set the rice to cook!
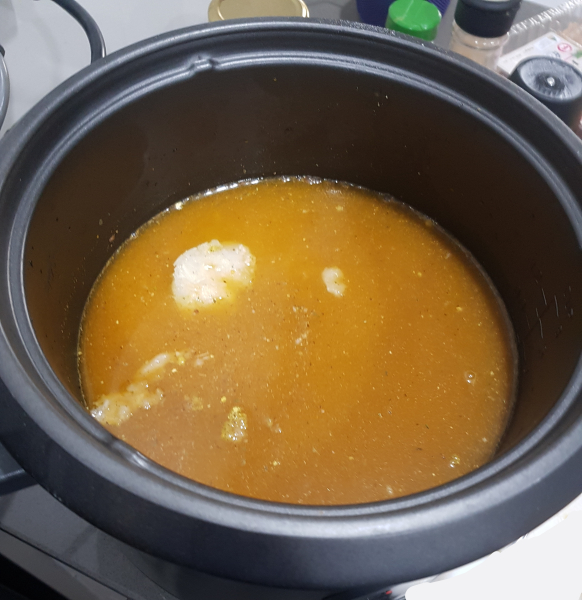
3) Allow the curry to simmer, and start grilling the sausages!

4) Optional Step - Set off your apartment smoke alarm twice.
5) When your sausages are nearing completion, add dicedcherry tomatoes tamato berries to the curry.
6) When your rice is done, there will be a layer of spices on the top. Use a fork to stir them in. Your rice is now ready to serve.
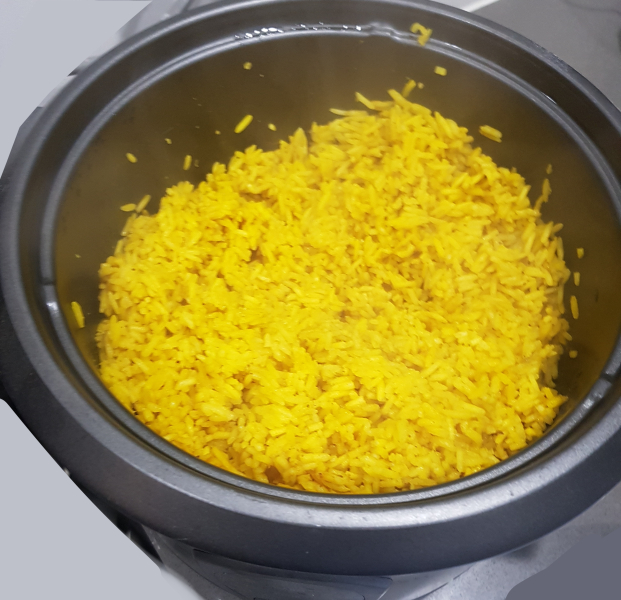
7) Serve your curry!
8) Don't forget a little serve for your little Pokemon!
First up the Ingredients:

You may be thinking: "Claine, isn't it cheating to make curry with Curry Roux!" And to that I say no! In fact, this is the standard way of making curry in Japan! There's almost an entire aisle in the supermarket dedicated to various brands of curry roux! And considering it contains little more than oil, curry powder and a bit of thickening agent, it's no different than just buying curry powder.
By the way - for big tunes I recommend Gogol Bordello! But feel free to blast whatever flavour of tunes you enjoy!
1) Fry your pork. Chop your Carrots and Potatoes into large pieces and add to the pot when the pork is cooked. Add water, curry roux splash of Worcester sauce and tablespoon of Chutney. Any chutney will do! I used Onion today, but tomato or fruit chutney both also taste delicious! For me, half a box of roux resulted in the right thickness + spice but adjust if needed!

2) To a rice cooker add white rice, chicken stock (equal parts), turmeric, other spices, and a tablespoon of coconut oil. This recipe is easy to make, and feel free to put whatever spices you have hanging around! Chili, coriander, onion powder, garlic! Whatever you have on hand! Set the rice to cook!

3) Allow the curry to simmer, and start grilling the sausages!

4) Optional Step - Set off your apartment smoke alarm twice.
5) When your sausages are nearing completion, add diced
6) When your rice is done, there will be a layer of spices on the top. Use a fork to stir them in. Your rice is now ready to serve.

7) Serve your curry!
8) Don't forget a little serve for your little Pokemon!

Quipy_Cat's Mallow Log
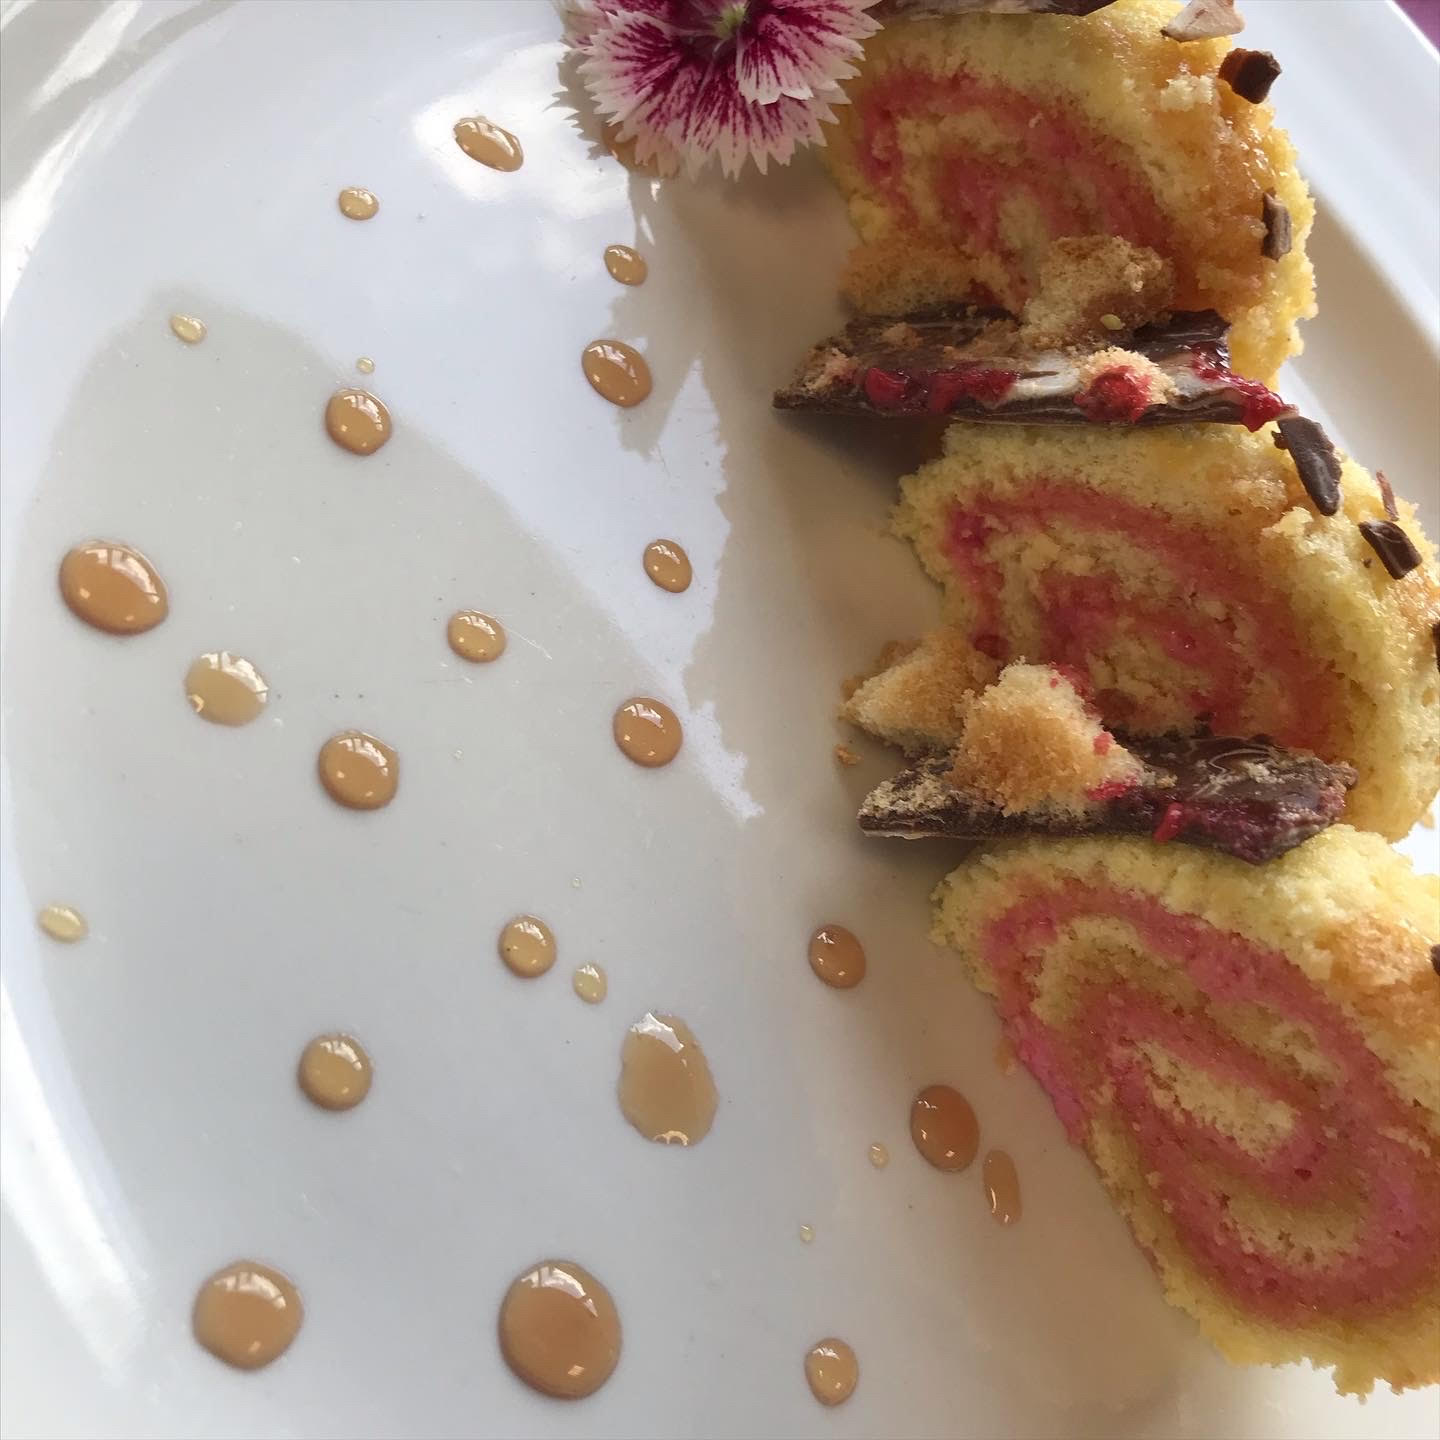
Quoth the Quipy Cat: "In a mystic land where gooey yumminess with a crunch of deliciousness meets. A land where Bunnies run supreme. As a gift, they gave me their secret dish, a treat to a friend, one they entrusted me to share..." It appears to be a recipe for a marshmallow swiss roll with chocolate bark!
Click for Quipy_Cat's instructions
Method behind the madness:
1. On your stovetop place, 1 pot filled with water, on medium to bring the water to a boil.
2. Using 2 steel or glass bowls place the marshmallows and cream into one and the chocolate roughly chopped up into the other.
3. Place the chocolate one on a pot and let it melt at its one pace [don't disturb it till it's almost fully melted] while you wait, prep a glass square
dish or even a plate, by spraying spray and cook over baking paper and place it on the dish. Once the chocolate has melted pour in and break
the ladyfinger cookies over. Set aside, either in the fridge or a cool area. {this is the bark}
4. Preheat your oven to 180'C. Line a baking tray with baking paper and spray with spay and cook (please this is to prevent the cake from
sticking )
5. Whisk the egg yolks, salt, and 125ml of sugar together till light and frothy. Add 5ml essence in. Now mix the sifted flour in.
6. Start beating the egg whites, once frothy add the 15ml sugar in at a steady pace. Mix till stiff peak stage.
7. Fold in 1/3 of the egg whites into the egg yolk & flour mixture, mix well till combined. Once a paste mixture add the rest and fold in.
8. Now Place the bowl of Marshmallows on the pot and let that yumminess melt. Place a saucepot on the stove, add 30ml of sugar, 50ml water,
and 10 ml Vanilla and stir till the sugar is dissolved. Place on medium-low heat (this is a vanilla syrup you are going to make)
9. Put you cake in the oven and bak 10-15 mins, till golden [not really brown]
10. Stir you marshmallow mix once melted, set aside [no need for that pot anymore]. Check the vanilla syrup... After about 15mins it should be
done (don't expect golden syrup consistency.]
11.Now, once the cake is baked turn out onto a damp cloth, remove the baking paper. Now to assemble:
A. With a brush, add the syrup onto the cake, this is to keep it moist.
B.Spread the Marshmallow filling over the cake, evenly
C. Now roll it up {ask your Grandmother, Mother or YouTube for help if you don't know how}
D. Once rolled, roll up in the same damp cloth and tie the ends and let it set.
12. Break the set chocolate into strips "bark" and serve it with the Mallow Roll. Add editable flowers then it looks like it came from Easter Isles.
Ingredients:
*125ml cake flour [sifted]
*1 ml Salt
*3 eggs [seperated]
*170ml castor sugar (split up into 125ml, 15ml & 30ml)
*15 ml vanilla
*50ml water
*250g marshmallows (the rest of the 400g pack you can eat)
*50 ml cream
*80g of chocolate (your choice, a top deck or triple-decker would work well, nuts and fruits too)
*3 ladyfinger cookies
Method behind the madness:
1. On your stovetop place, 1 pot filled with water, on medium to bring the water to a boil.
2. Using 2 steel or glass bowls place the marshmallows and cream into one and the chocolate roughly chopped up into the other.
3. Place the chocolate one on a pot and let it melt at its one pace [don't disturb it till it's almost fully melted] while you wait, prep a glass square
dish or even a plate, by spraying spray and cook over baking paper and place it on the dish. Once the chocolate has melted pour in and break
the ladyfinger cookies over. Set aside, either in the fridge or a cool area. {this is the bark}
4. Preheat your oven to 180'C. Line a baking tray with baking paper and spray with spay and cook (please this is to prevent the cake from
sticking )
5. Whisk the egg yolks, salt, and 125ml of sugar together till light and frothy. Add 5ml essence in. Now mix the sifted flour in.
6. Start beating the egg whites, once frothy add the 15ml sugar in at a steady pace. Mix till stiff peak stage.
7. Fold in 1/3 of the egg whites into the egg yolk & flour mixture, mix well till combined. Once a paste mixture add the rest and fold in.
8. Now Place the bowl of Marshmallows on the pot and let that yumminess melt. Place a saucepot on the stove, add 30ml of sugar, 50ml water,
and 10 ml Vanilla and stir till the sugar is dissolved. Place on medium-low heat (this is a vanilla syrup you are going to make)
9. Put you cake in the oven and bak 10-15 mins, till golden [not really brown]
10. Stir you marshmallow mix once melted, set aside [no need for that pot anymore]. Check the vanilla syrup... After about 15mins it should be
done (don't expect golden syrup consistency.]
11.Now, once the cake is baked turn out onto a damp cloth, remove the baking paper. Now to assemble:
A. With a brush, add the syrup onto the cake, this is to keep it moist.
B.Spread the Marshmallow filling over the cake, evenly
C. Now roll it up {ask your Grandmother, Mother or YouTube for help if you don't know how}
D. Once rolled, roll up in the same damp cloth and tie the ends and let it set.
12. Break the set chocolate into strips "bark" and serve it with the Mallow Roll. Add editable flowers then it looks like it came from Easter Isles.
Fastgirl01's Wizard of Oz Cake
Unbelievably, this is the first cake that Fastgirl01 had ever made... And it turned out like this!
Alas, she didn't submit a recipe. But she says: "I used a red velvet cake mix for the cake itself and got rose icing decorations at Walmart. Fondant makes up the blue sky, the yellow brick road, and the emerald city in the distance; everything else is frosting."
Tusitala2017's RPR Bread Braids
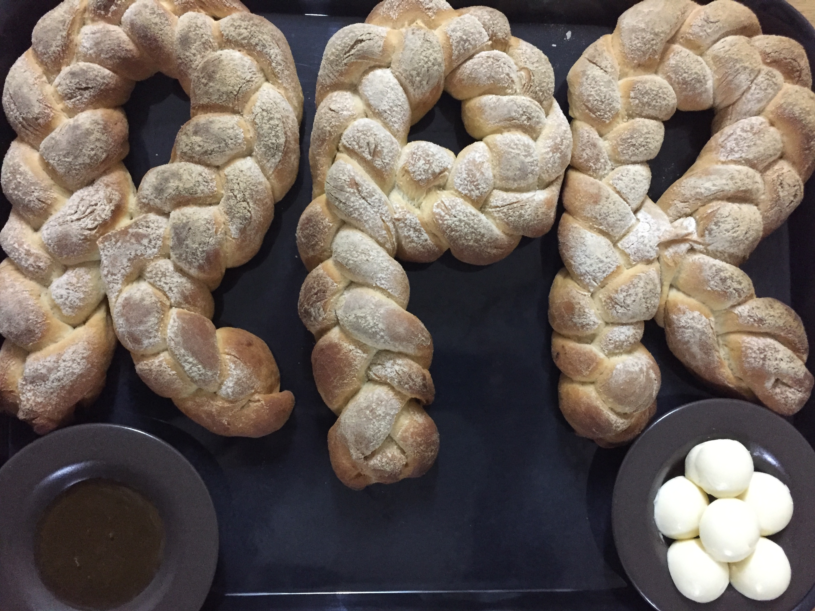
Sharing bread with a guest is a symbol of friendship and hospitality... but how much more so when it's artisan RPR bread???
Click for Tusitala2017's instructions
Artisan RPR home-made bread (with butter and honey) fit for Kim's Palace
Ingredients:
- 500 grs rice flour (you can also use normal wheat flour)
- 7 grs of gluten free yeast for making bread dough (stronger yeast) (you can also use normal baker's yeast with gluten or if you use fresh yeast you need 25 grs instead)
- 1 or 2 tea spoons of salt
- 3 table spoons of olive oil
- 300 mls of water
Steps:
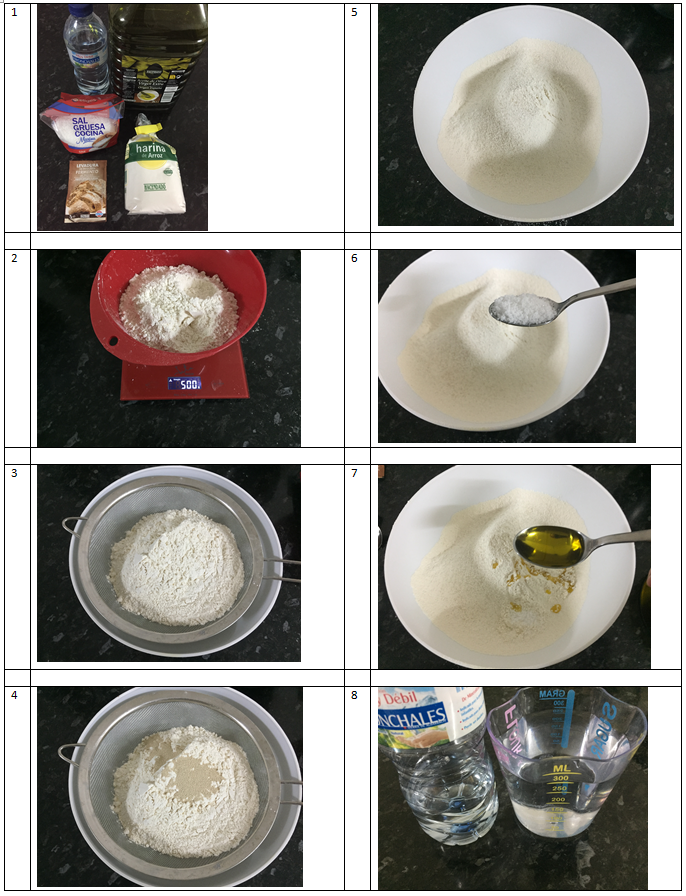
1. Gather the ingredients
2. Weight 500 grs of flour
3. Take a large mixing bowl, place a fine mesh strainer on top and add the flour
4. Add the sachet of yeast
5. Sift the flour and yeast into the bowl
6. Add a tea spoon of salt (or 2)
7. Add 3 spoonfuls of olive oil
8. Measure 300 mls of water and pour it into the mixture
9. Stir the batter with a spoon
10/11. Mix until you achieve a sticky dough, ensure you have mixed all the flour from the sides and bottom until the bowl looks clean
12. find a clean non-stick surface (worktop or counter)
13. Use the fine mesh strainer and add flour into it
14. Sift the flour to sprinkle it over the surface into an even layer
15. Add the dough from the bowl onto the floured worktop and sift more flour on the dough to make it less sticky
16. Knead the dough with the palm of the hand, adding sifted flour as needed. It should not be sticky. Do this for 15 minutes continously
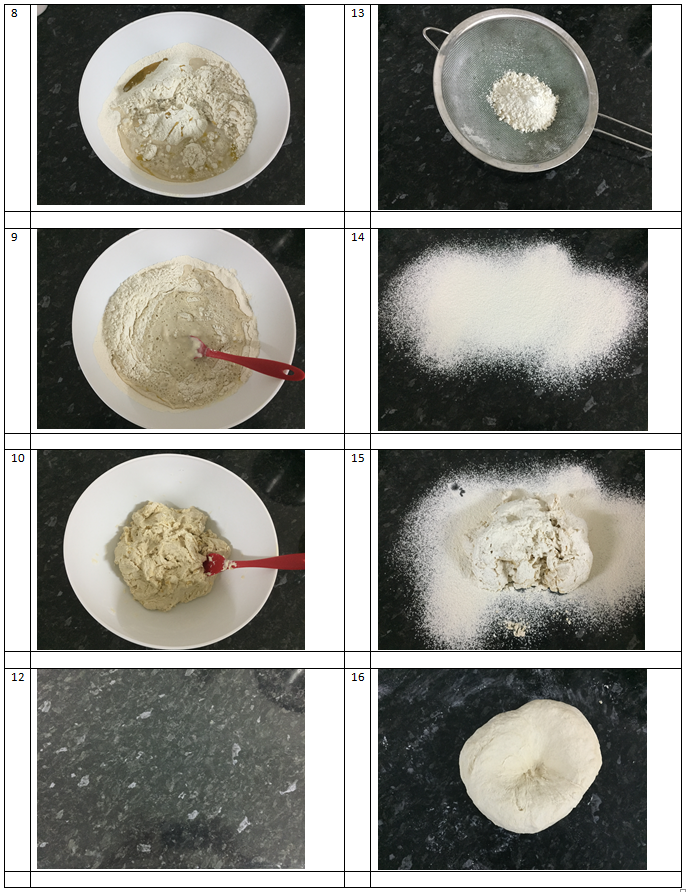
17. Roll the dough into a ball
18. Grab the mixing bowl, clean and dry it
19. Pour olive oil into the bowl around all the sides
20. Pick up a cooking brush or the tip of the fingers and spread the oil
21. Ensure the whole bowl and all its sides are fully coated in the oil
22. Place the dough ball into the oiled bowl
23. Use transparent wrapping film to cover the bowl. Leave it aside to rest/prove for 1 hour.
24. In 1 hour the dough will have doubled in size.
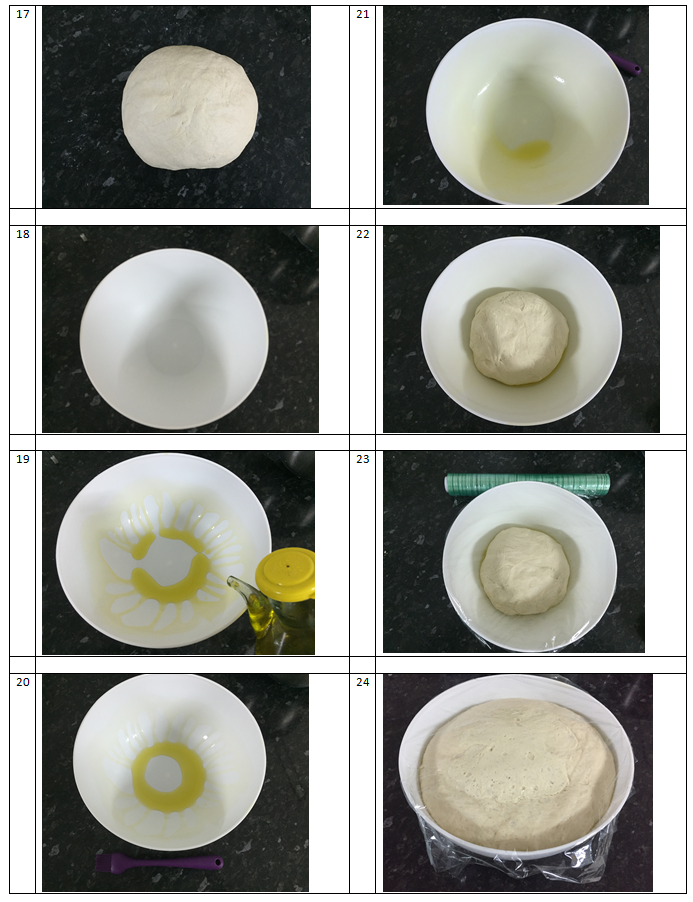
25. Sprinkle sifted flour over the dough and worktop. Take the dough out of the bowl and tip it onto the worktop
26. Beat the air out of the dough by punching the air out or using a rolling pin. Knead the dough for another 15 minutes, keep adding sifted flour in thin layers/small quantities as needed to ensure the dough doesn't stick to the surface
27. Roll the dough into a ball
28. Place it back into the previously oiled bowl
29. Leave to rest for 1 hour. It will again increase in size
30. Take chunks of dough (of around 75grs each)
31. You need 9 chunks of dough
32. Sprinkle sifted flour onto the dough balls and surface
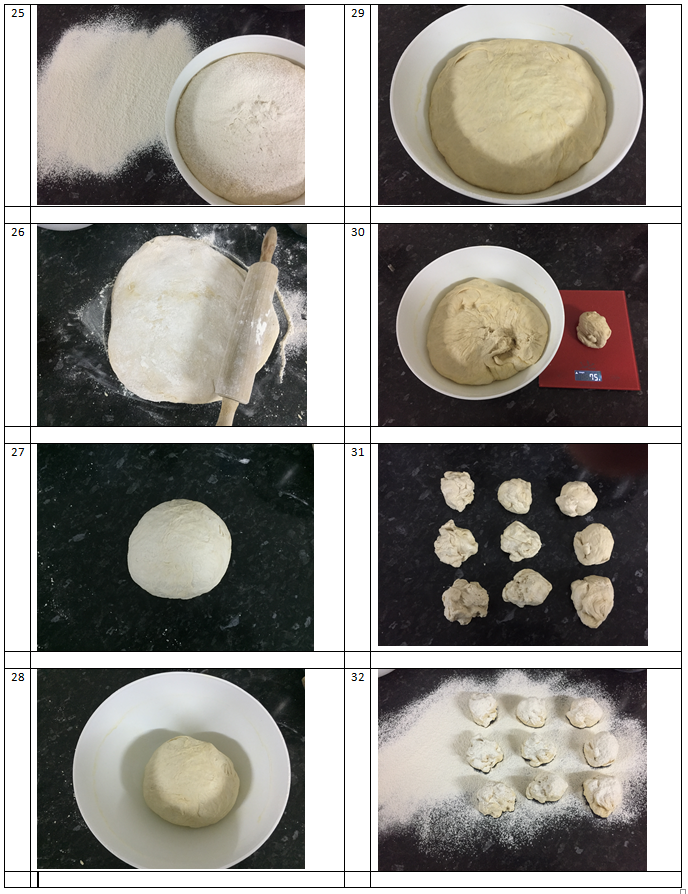
33. Roll the balls into strings. The strings should be not too thin else they will break when braiding
34. Separate the strings into 3 groups of 3 strings
35. Grab 3 strings and join them at one end, braid them together. Repeat until you get 3 braids
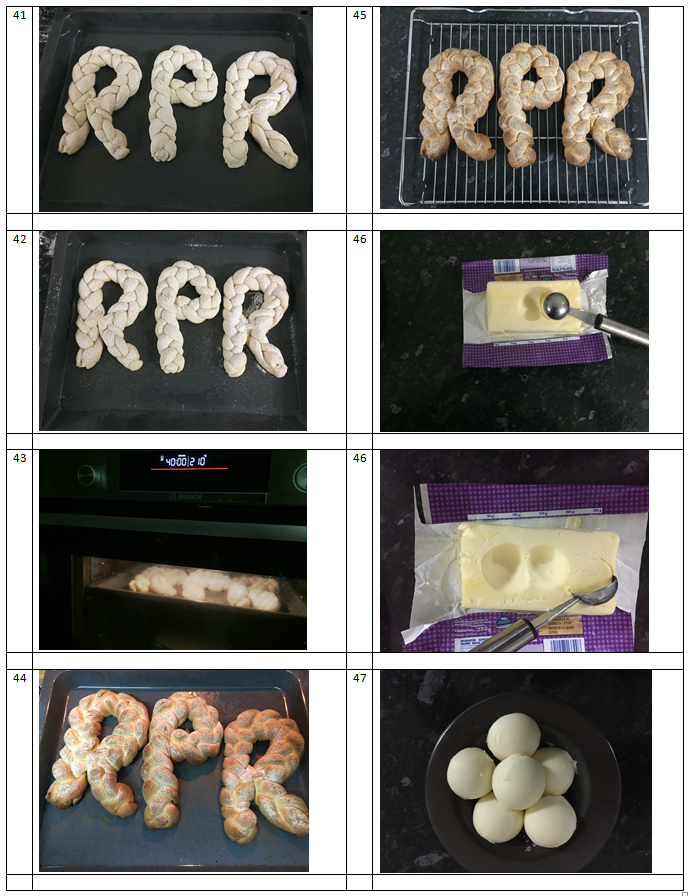
36. Shape the braids into the letters R P R
37. Grab a large oven baking tray
38. Pour olive oil on the baking tray
39. Using a cooking brush or the tip of the fingers, spread the oil
40. The baking tray should have an even coating of oil all over the base
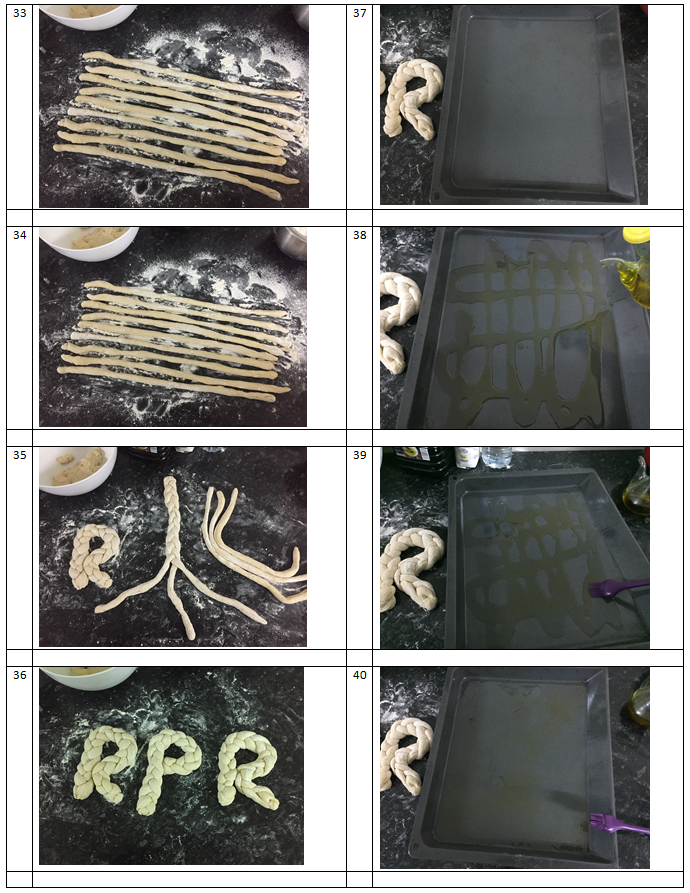
41. Place the dough letters RPR carefully onto the oiled baking tray
42. Sprinkle a very thin layer of flour over the top
43. Place in the oven 210ºC for 40 minutes
44. Remove the tray when the bread is baked
45. Place on a cooling rack
46. Pick up lactose free butter (or normal butter) and scoop out 5 balls of butter with a melon baller
47. Place the butter balls carefully onto a small plate for serving (I used a tea cup saucer)
48. Pour some honey onto another small plate for serving (I used a tea cup saucer)
49. Place the baked bread and the butter and the honey onto a tray
50. Present and serve it, ready to eat
Artisan RPR home-made bread (with butter and honey) fit for Kim's Palace
Ingredients:
- 500 grs rice flour (you can also use normal wheat flour)
- 7 grs of gluten free yeast for making bread dough (stronger yeast) (you can also use normal baker's yeast with gluten or if you use fresh yeast you need 25 grs instead)
- 1 or 2 tea spoons of salt
- 3 table spoons of olive oil
- 300 mls of water
Steps:
1. Gather the ingredients
2. Weight 500 grs of flour
3. Take a large mixing bowl, place a fine mesh strainer on top and add the flour
4. Add the sachet of yeast
5. Sift the flour and yeast into the bowl
6. Add a tea spoon of salt (or 2)
7. Add 3 spoonfuls of olive oil
8. Measure 300 mls of water and pour it into the mixture

9. Stir the batter with a spoon
10/11. Mix until you achieve a sticky dough, ensure you have mixed all the flour from the sides and bottom until the bowl looks clean
12. find a clean non-stick surface (worktop or counter)
13. Use the fine mesh strainer and add flour into it
14. Sift the flour to sprinkle it over the surface into an even layer
15. Add the dough from the bowl onto the floured worktop and sift more flour on the dough to make it less sticky
16. Knead the dough with the palm of the hand, adding sifted flour as needed. It should not be sticky. Do this for 15 minutes continously

17. Roll the dough into a ball
18. Grab the mixing bowl, clean and dry it
19. Pour olive oil into the bowl around all the sides
20. Pick up a cooking brush or the tip of the fingers and spread the oil
21. Ensure the whole bowl and all its sides are fully coated in the oil
22. Place the dough ball into the oiled bowl
23. Use transparent wrapping film to cover the bowl. Leave it aside to rest/prove for 1 hour.
24. In 1 hour the dough will have doubled in size.

25. Sprinkle sifted flour over the dough and worktop. Take the dough out of the bowl and tip it onto the worktop
26. Beat the air out of the dough by punching the air out or using a rolling pin. Knead the dough for another 15 minutes, keep adding sifted flour in thin layers/small quantities as needed to ensure the dough doesn't stick to the surface
27. Roll the dough into a ball
28. Place it back into the previously oiled bowl
29. Leave to rest for 1 hour. It will again increase in size
30. Take chunks of dough (of around 75grs each)
31. You need 9 chunks of dough
32. Sprinkle sifted flour onto the dough balls and surface

33. Roll the balls into strings. The strings should be not too thin else they will break when braiding
34. Separate the strings into 3 groups of 3 strings
35. Grab 3 strings and join them at one end, braid them together. Repeat until you get 3 braids
36. Shape the braids into the letters R P R
37. Grab a large oven baking tray
38. Pour olive oil on the baking tray
39. Using a cooking brush or the tip of the fingers, spread the oil
40. The baking tray should have an even coating of oil all over the base

41. Place the dough letters RPR carefully onto the oiled baking tray
42. Sprinkle a very thin layer of flour over the top
43. Place in the oven 210ºC for 40 minutes
44. Remove the tray when the bread is baked
45. Place on a cooling rack
46. Pick up lactose free butter (or normal butter) and scoop out 5 balls of butter with a melon baller
47. Place the butter balls carefully onto a small plate for serving (I used a tea cup saucer)

48. Pour some honey onto another small plate for serving (I used a tea cup saucer)
49. Place the baked bread and the butter and the honey onto a tray
50. Present and serve it, ready to eat
Somnom's Space Scrounged Sweet Energy Disks
Looking for some sugar-fuel to keep you going about your space errands? Reach for one of Somnom's Space Scrounged Sweet Energy Disk cookies!
Click for Somnom's recipe and more pictures
Ingredients:
Steps:
Ingredients:
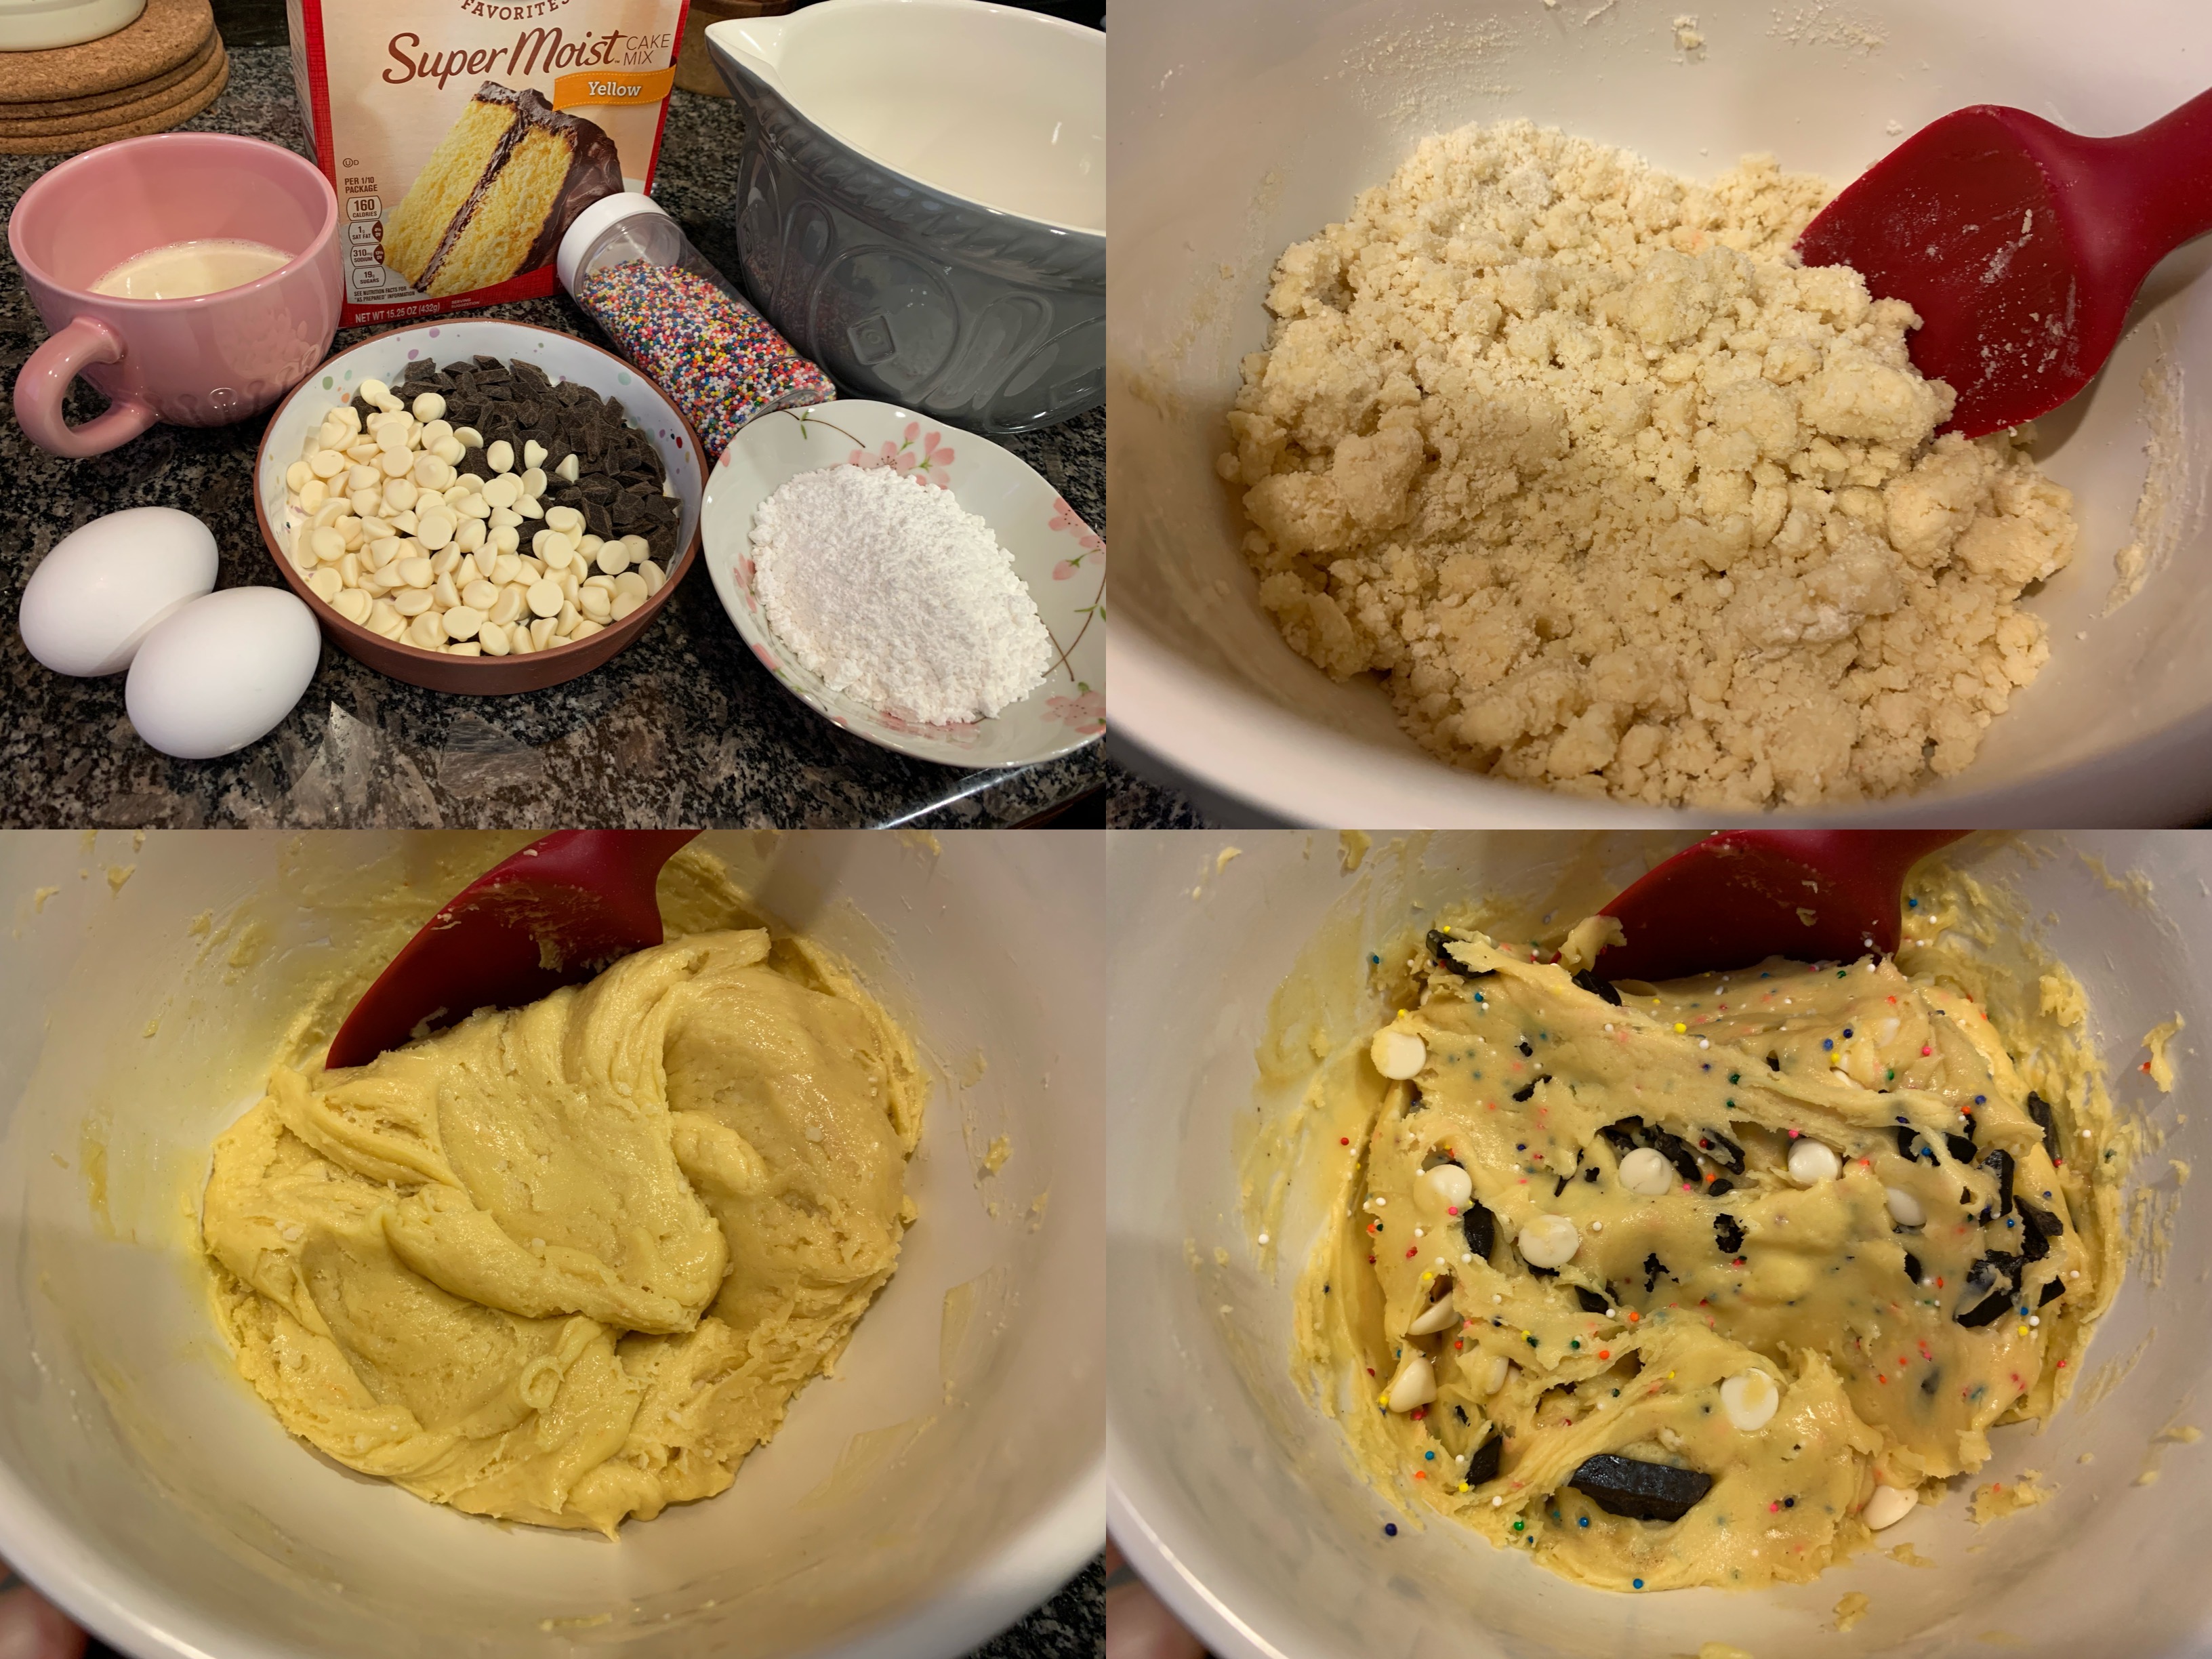
- 1 box (15.25 oz or 432g) of cake mix - any flavor you want/can find! (I used a yellow/vanilla cake mix)
- 1 stick (½ cup or 110g) unsalted butter, melted {note: for non-American bakers, our butter has more water content compared to European butters, so you may need an additional 15-30g of butter}
- 2 large eggs
- Up to 1.5 cups of add ins - such as nuts, dried fruits, or candy pieces (I used a mix of semi-sweet chocolate chunks and white “chocolate” baking chips)
- 2 tablespoons
colorful sprinkles/jimmies/100s and 1000s/nonpareilscosmic space dust (optional) - ¼ cup powdered/confectioner's sugar (to roll the dough in before baking)
Steps:
- Set a rack in the middle of your oven and preheat oven to 325° F (165° C or Gas Mark 3)
- Empty the package of cake mix into a large mixing bowl and add the melted butter. Combine until most of the mixture is moist and looks like damp soil. {note: Non-American bakers, this is where you might need the additional butter if the mix looks too powdery.}
- Add in eggs and mix until well combined. This is gonna take some muscle work, but keep at it and the dough will come together and should be easily formed into balls.
- Pour in your add ins and sprinkles to the bowl then mix until evenly distributed throughout the dough.
- Form about a heaping tablespoon of dough into a ball with your hands, then roll in powdered/confectioner's sugar to coat. This step is important because it'll help to make your cookies less greasy!
- Place the sugar coated ball of dough onto a nonstick or parchment paper lined baking sheet. Lightly press down on the ball to flatten it just a little. These cookies don't spread too much, so you can fit a lot of them onto a baking sheet closer together than traditional cookies.
- Bake for 25 minutes, 20 minutes if you want a chewier cookie.
- Remove pan from oven and let cookies cool on the baking tray for 5 minutes before moving to a plate to fully cool.
These cookies can time/space travel with you for up to a week in an airtight container or ziplock bag!

Dragonfire's All Epic Week Cakes Cake
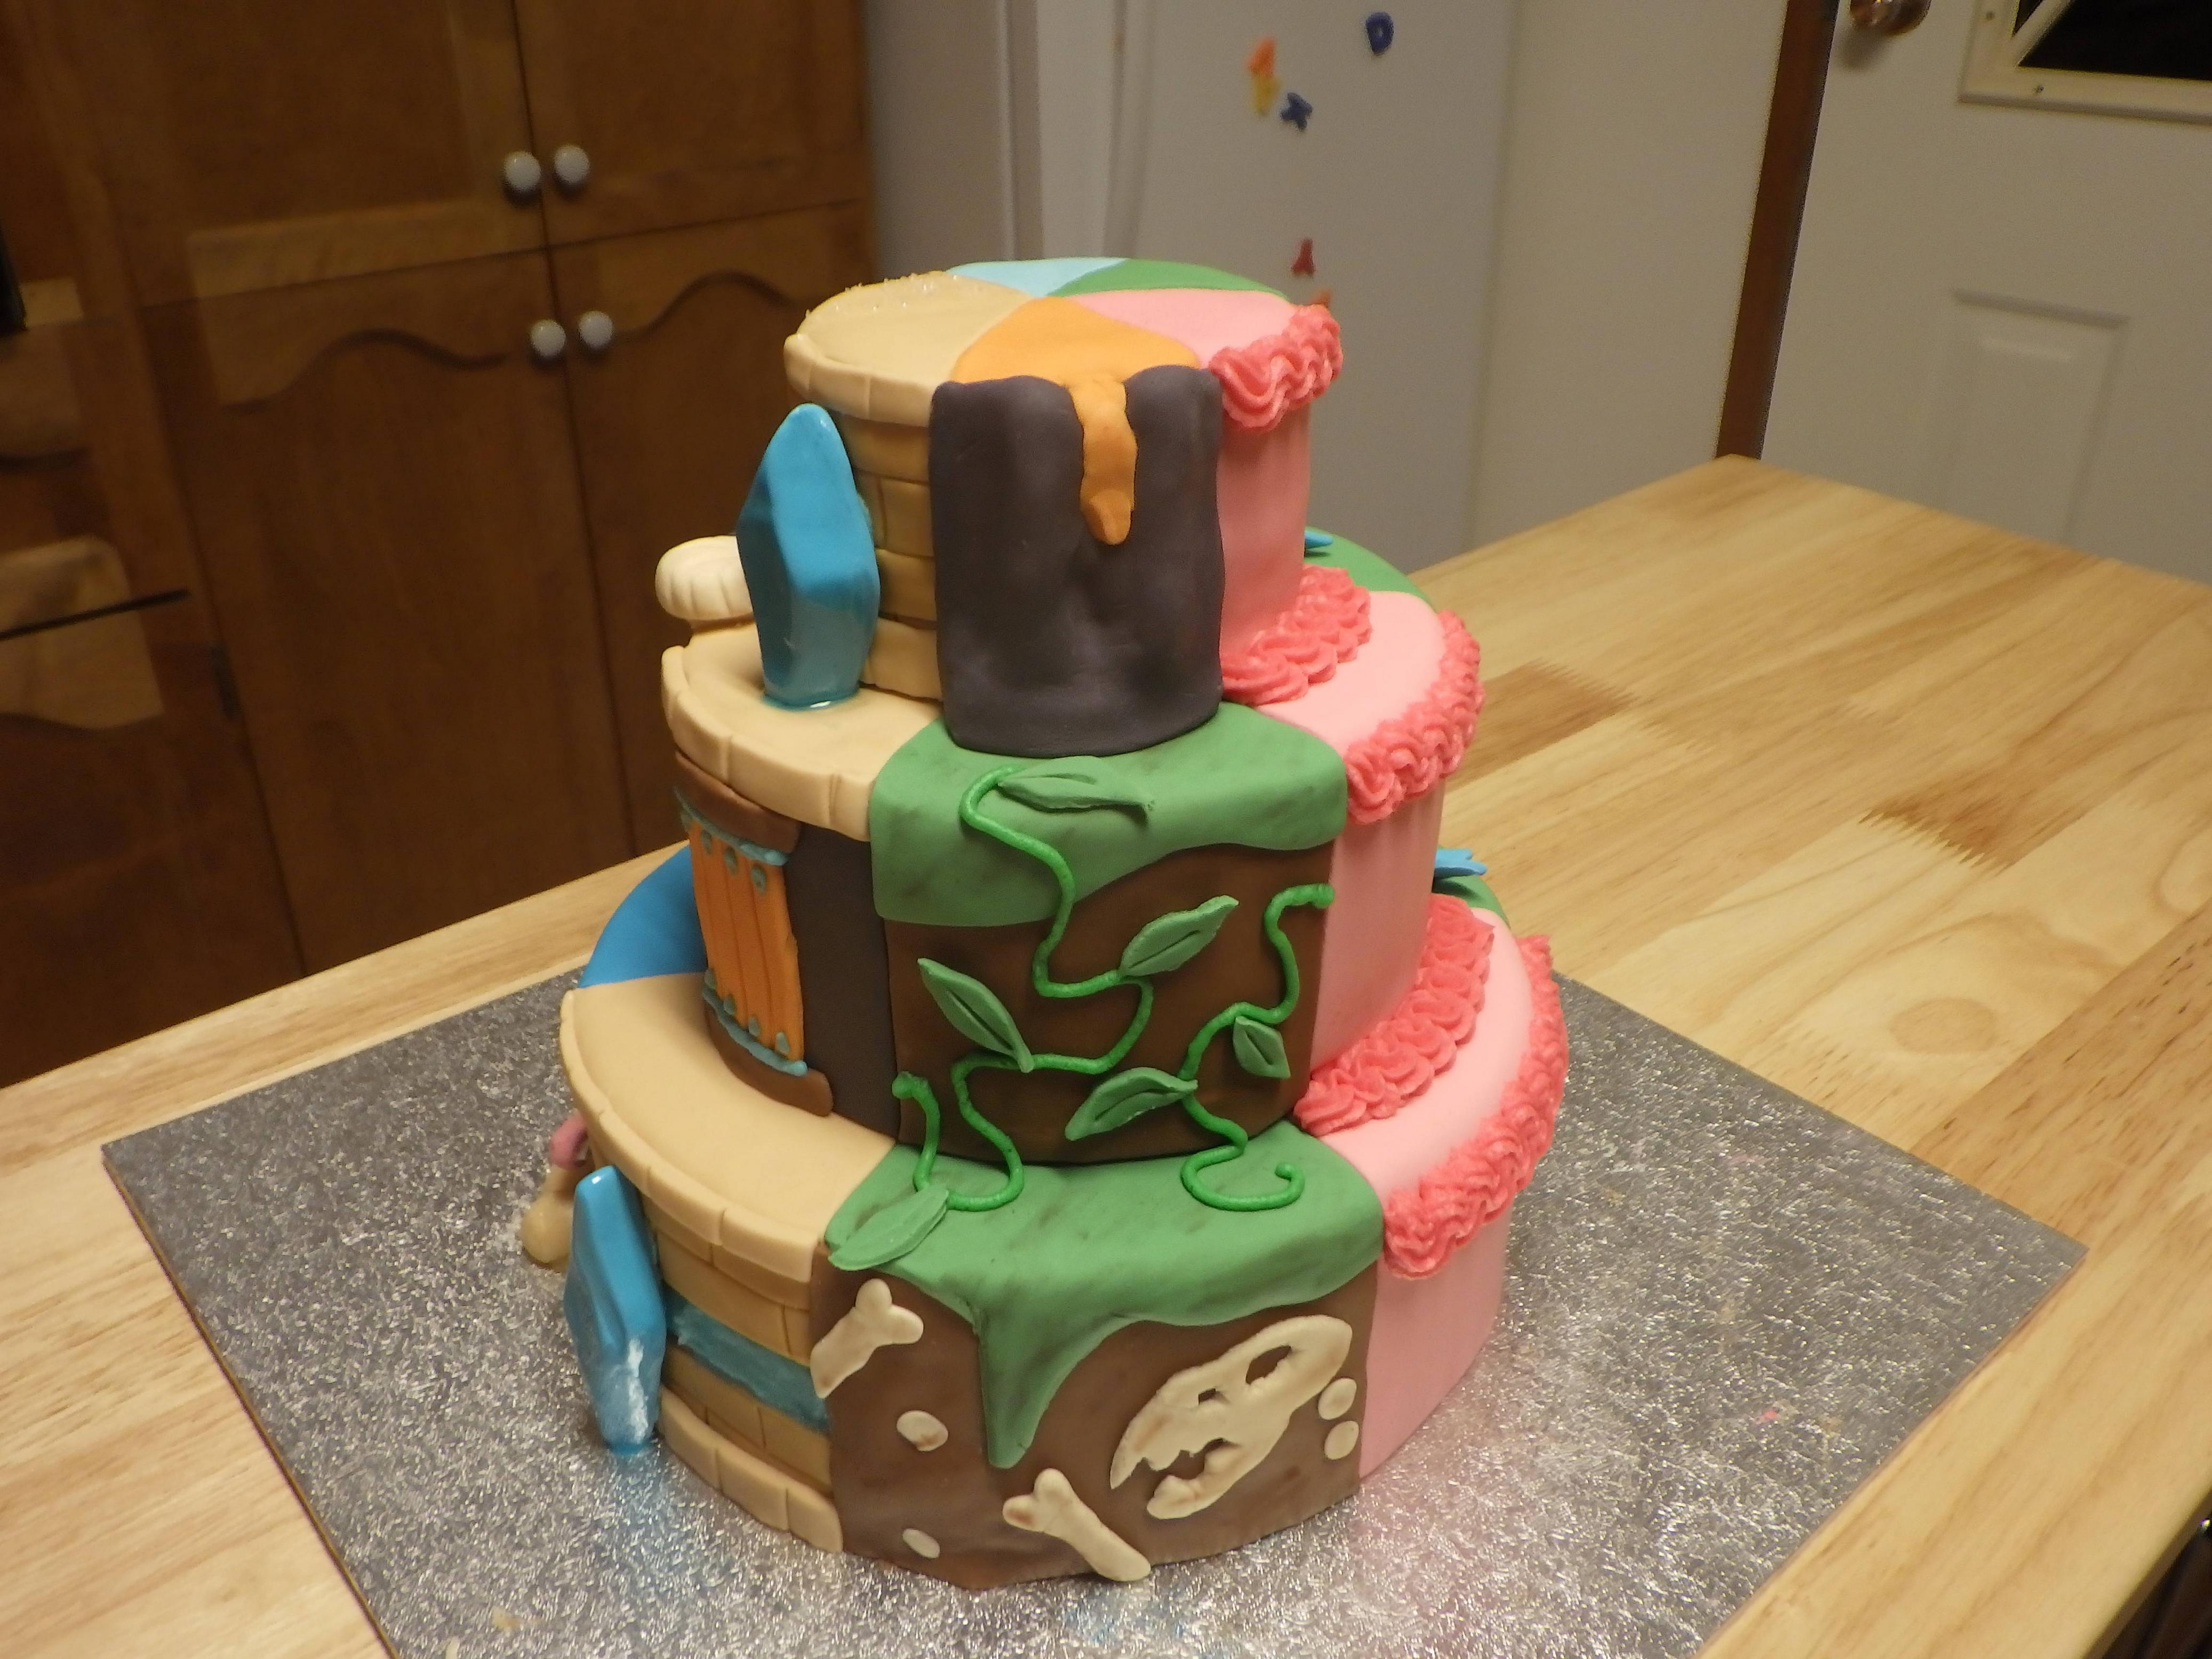
BEHOLD! Dragonfire's entry was all six of the Epic Week cake designs baked into a single cake. You've got to look at all the images of this one to get the full effect.
 2020's cake design
Click for more photos and the recipe
In the interests of quarantine and not having too many leftovers, the bottom two tiers of the Epic Cake shown here are styrofoam covered with fondant and icing.
The top tier - a much more manageable size of cake for two! - is hiding a reflection of RPR's logo: a deep, dark chocolate cake layered with vanilla swiss buttercream icing. And more fondant, of course.
 2015's cake design

 2016's cake design

 2017's cake design

 2018's cake design

 2019's cake design
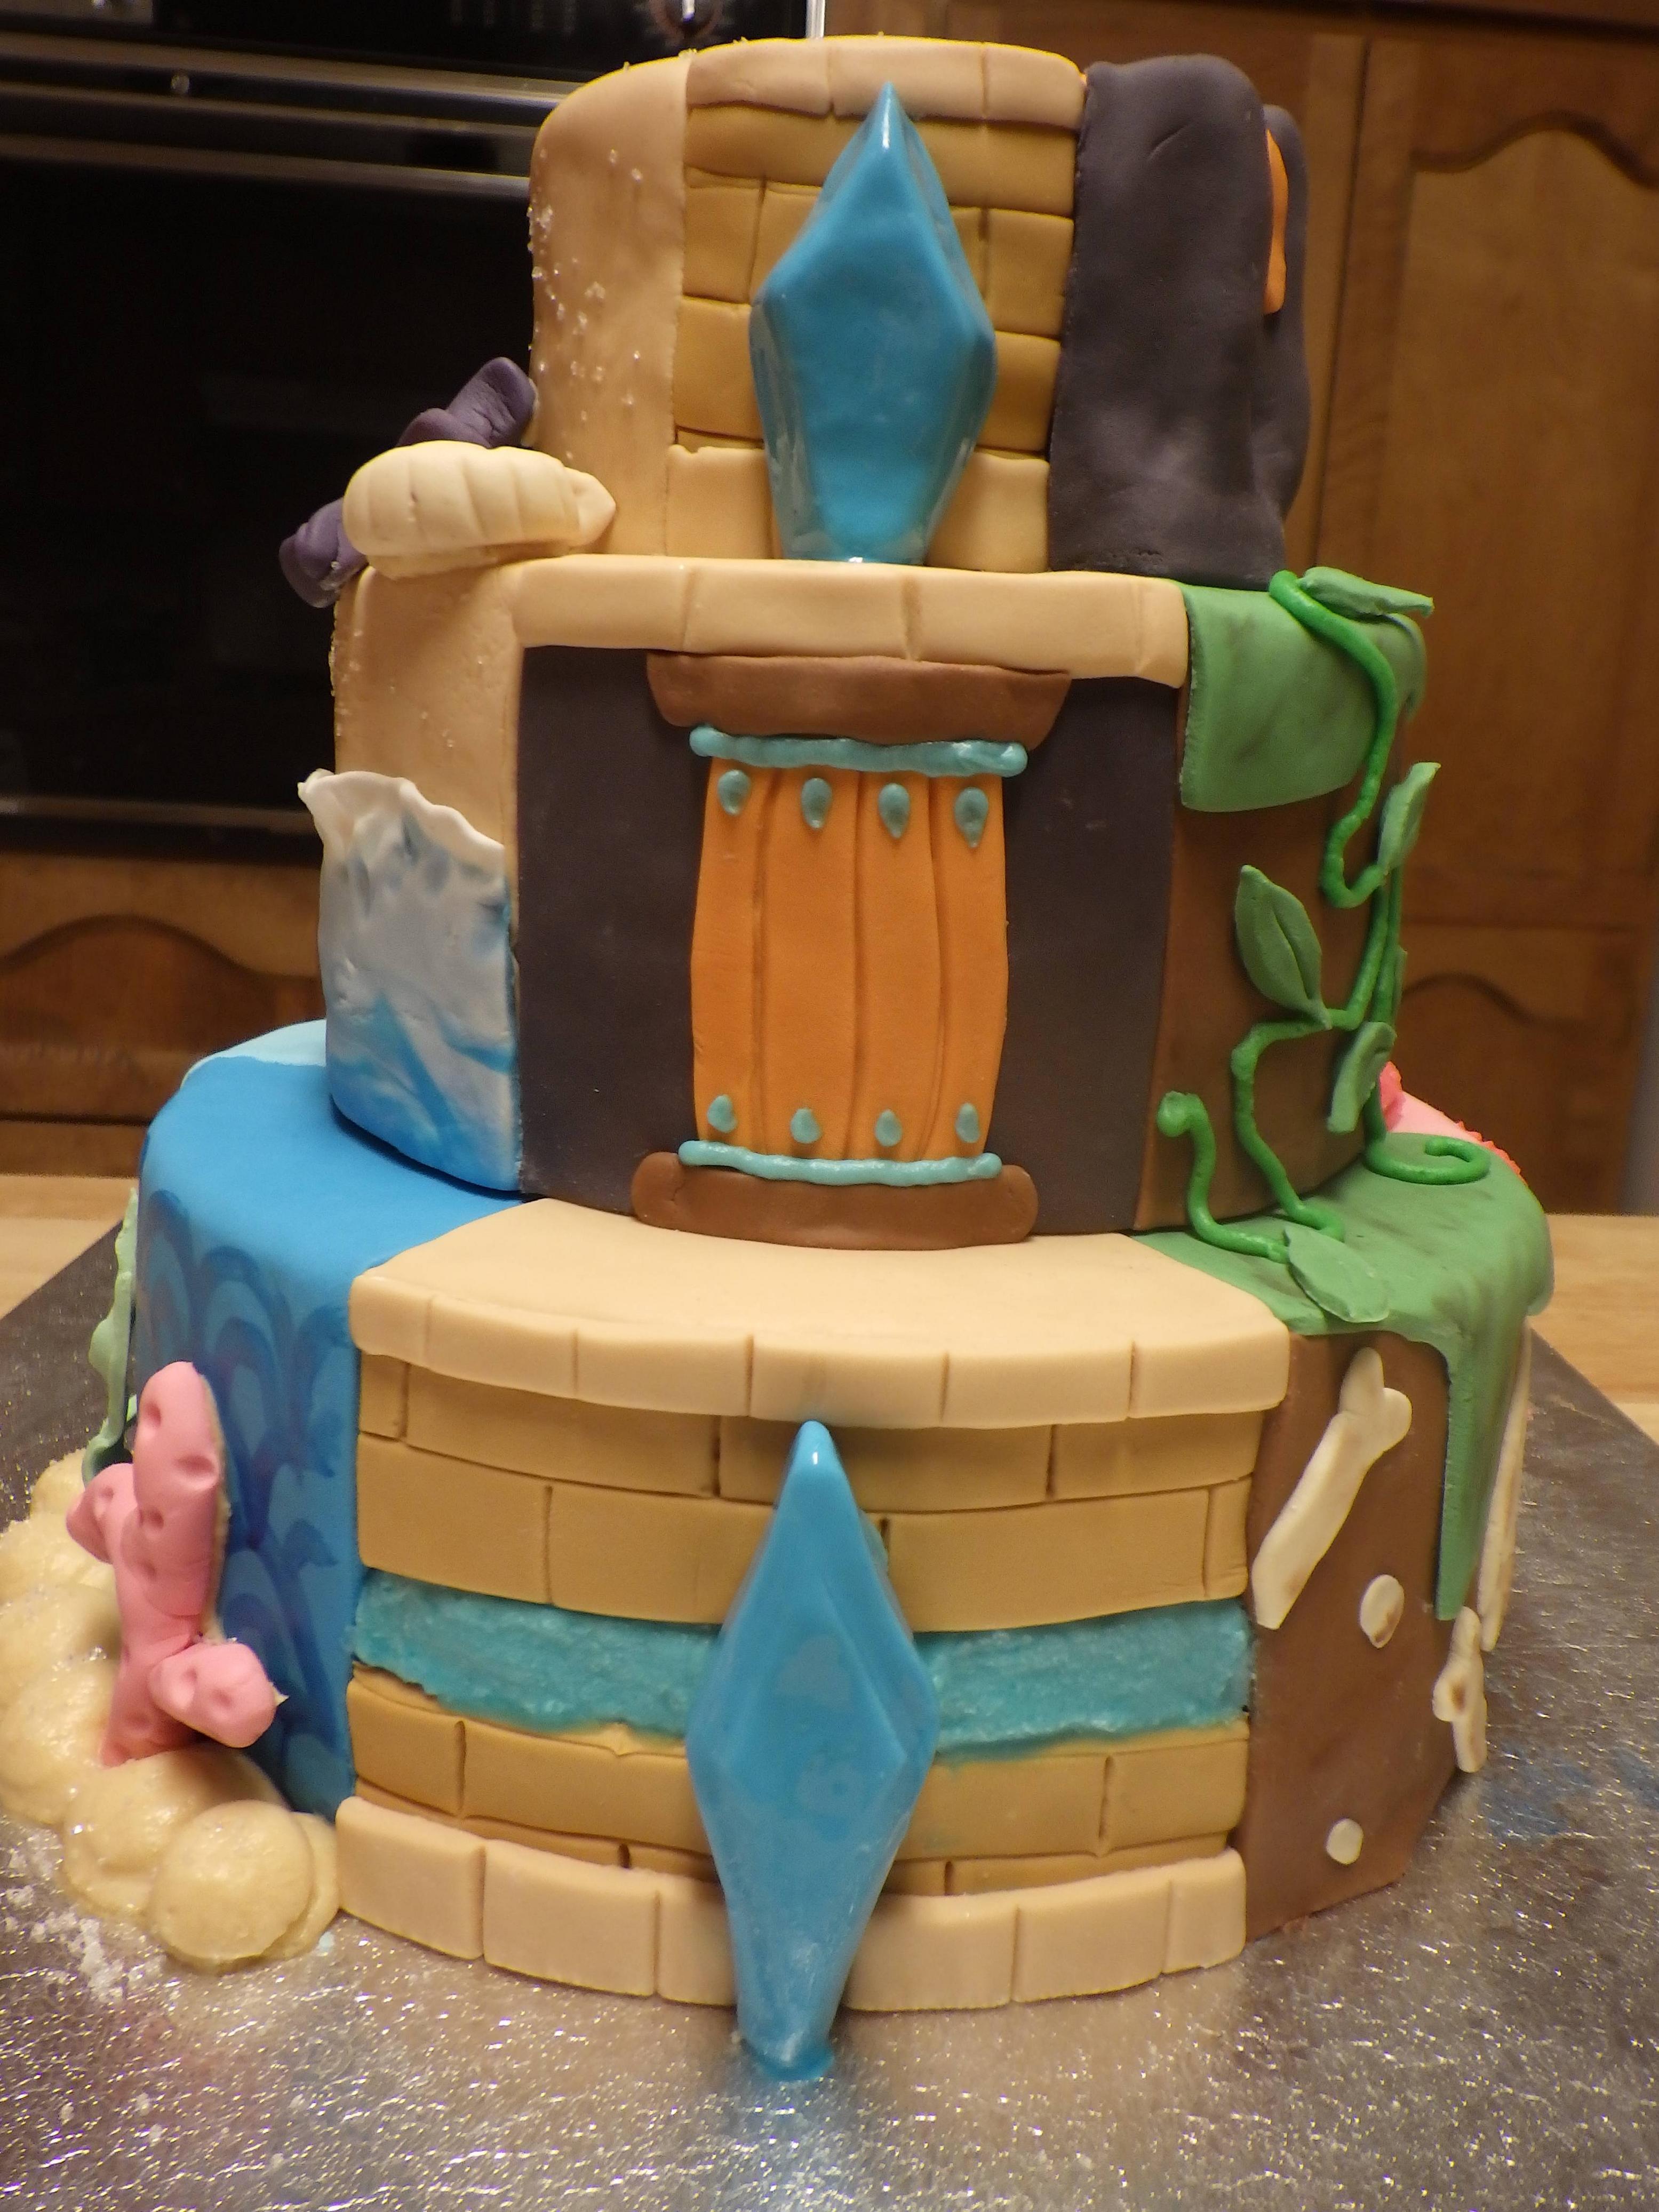
 2020's cake design
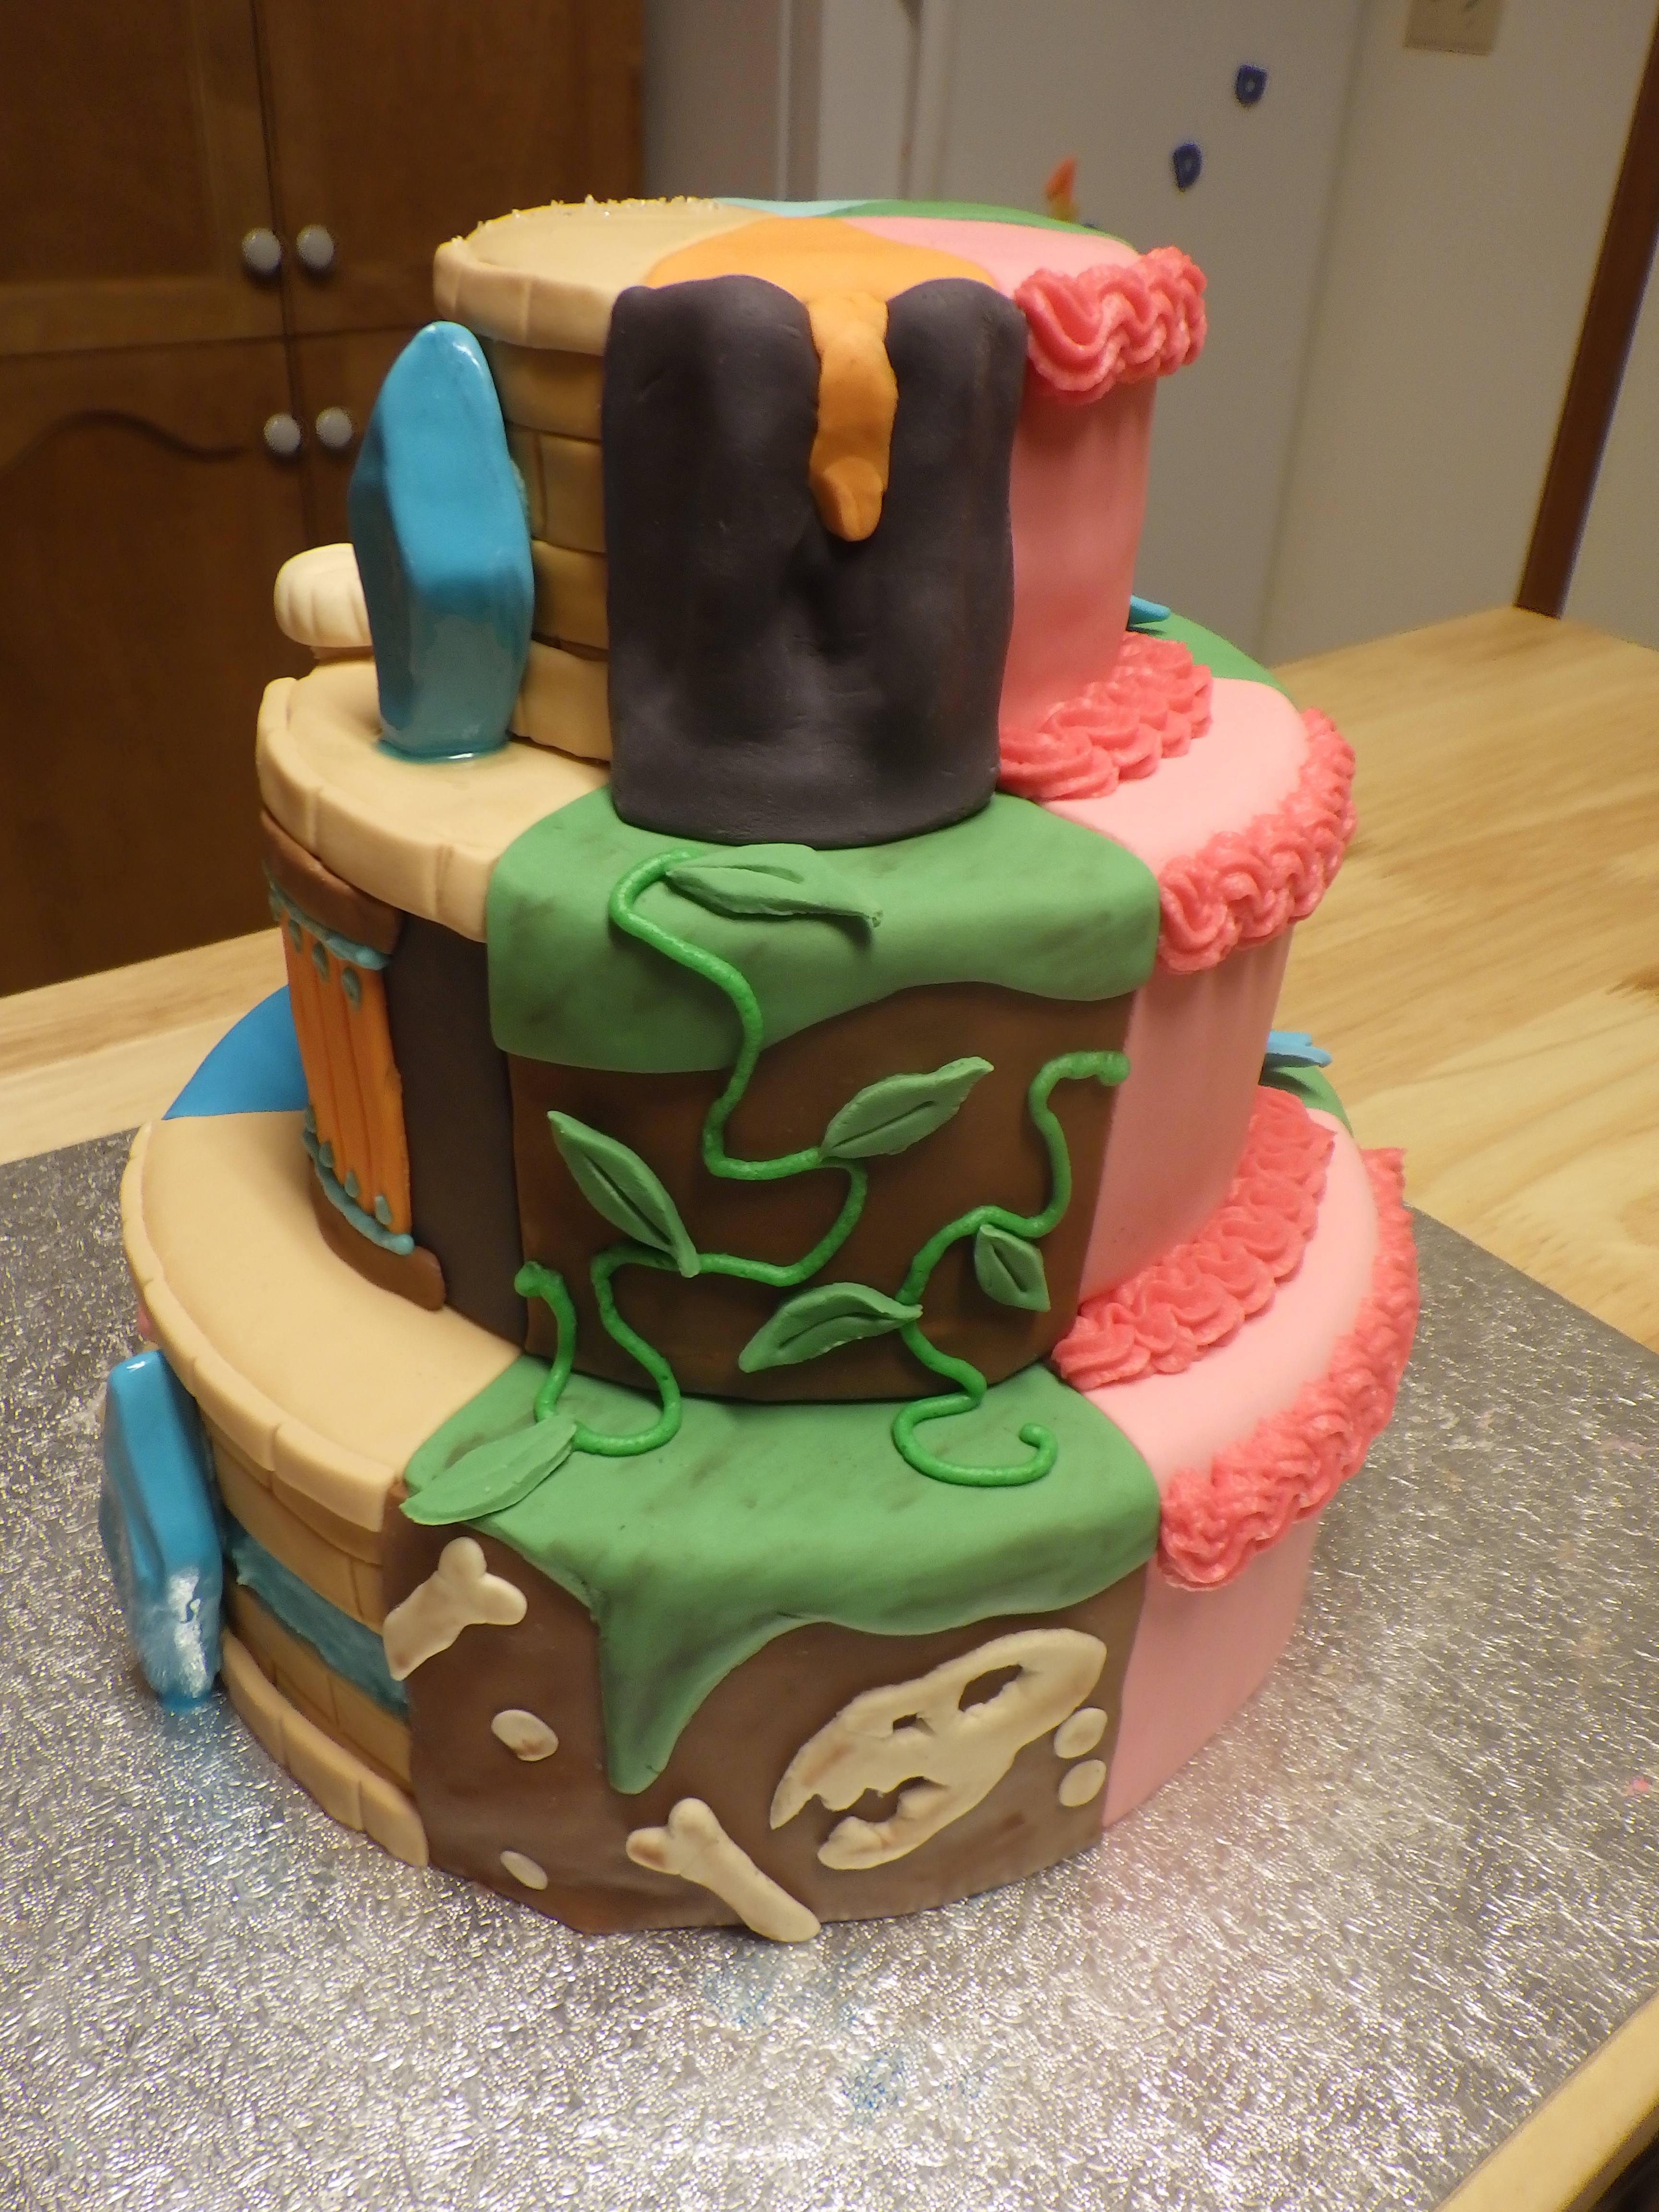
But that's not all... some of it glows in the dark!!!

Triple Dark Chocolate Cake from The Tough Cookie
Swiss Meringue Buttercream from Natasha's Kitchen
Glow in the Dark Buttercream from Hoosier Homemade
In the interests of quarantine and not having too many leftovers, the bottom two tiers of the Epic Cake shown here are styrofoam covered with fondant and icing.
The top tier - a much more manageable size of cake for two! - is hiding a reflection of RPR's logo: a deep, dark chocolate cake layered with vanilla swiss buttercream icing. And more fondant, of course.
 2015's cake design
 2016's cake design
 2017's cake design
 2018's cake design
 2019's cake design
 2020's cake design
But that's not all... some of it glows in the dark!!!

Recipes used in this cake
Triple Dark Chocolate Cake from The Tough Cookie
Swiss Meringue Buttercream from Natasha's Kitchen
Glow in the Dark Buttercream from Hoosier Homemade
Want even more amazing recipes? Check out the cooking contest 2020 thread!
Comments
All these looks so delicious! I am definitely making several of these when it cools down here enough to use the oven oof.
Shinyrainbowlithogra
August 19, 2020
10:01pm
Also, MercyInReach, I like your avatar picture. :V